ゼロから作るDeep Learningの第一章を読んでみたメモ
勉強したいなーー。と思ったので読みながら試してみます。
まずはPythonの使い方のおさらいあたりから。
Macでpythonのインストール
anacondaがよくわからないのでpyenvで入れてみます。
.pyenvをgit cloneしてきます。
|
1 |
$ git clone git://github.com/yyuu/pyenv.git ~/.pyenv |
.bash_profileに以下を追加します。
|
1 2 3 |
$ echo 'export PYENV_ROOT="$HOME/.pyenv"' >> ~/.bash_profile $ echo 'export PATH="$PYENV_ROOT/bin:$PATH"' >> ~/.bash_profile $ echo 'eval "$(pyenv init -)"' >> ~/.bash_profile |
.bash_profileをリロードします
|
1 |
$ source ~/.bash_profile |
pyenvコマンドを叩くことでpyenvが使えるようになりました
|
1 2 |
$ pyenv pyenv 1.0.10-5-gbcc8ab2 |
書籍で記述されているversion 3.4.1をインストールしてみます。
|
1 |
$ pyenv install 3.4.1 |
インストールできたらリハッシュします。
|
1 |
$ pyenv rehash |
使用するpythonを先程インストールした3.4.1に変更します。
|
1 2 3 |
$ pyenv global 3.4.1 $ pyenv global 3.4.1 |
pythonコマンド叩いてバージョンが表示されることも確認できました。
|
1 2 |
$ python Python 3.4.1 (default, Apr 15 2017, 14:56:15) |
pythonがphpenvのpythonを指しているのが分かります。
|
1 2 |
$ which python /Users/***/.pyenv/shims/python |
算術演算
^ は累乗ではなくビット演算のXORらしいです。累乗は**
|
1 2 3 4 5 6 7 8 |
>>> 1 + 2 3 >>> 7 / 5 1.4 >>> 3 ^ 2 1 >>> 3 ** 2 9 |
リスト
ここまでは、どのプログラミング言語にもある配列を入れてからの呼び出し
|
1 2 3 4 5 6 7 |
>>> a = [1, 2, 3] >>> a[0] 1 >>> a[1] 2 >>> a[2] 3 |
Pythonにはスライシングという機能があり、リストから、部分的にリストを抽出することができます。
|
1 2 3 4 5 6 7 8 9 |
>>> b = [1, 2, 3, 4, 5, 6, 7, 8, 9, 10] >>> print(b[0:2]) [1, 2] #0番目から2番目まで(2番目は含まない)をスライシング >>> print(b[1:]) [2, 3, 4, 5, 6, 7, 8, 9, 10] #1番目から最後までをスライシング >>> print(b[:3]) [1, 2, 3] #最初から3番目までをスライシング >>> print(b[:-1]) [1, 2, 3, 4, 5, 6, 7, 8, 9] #最初から最後の1つ前までにスライシング |
NumPy
pipをアップデートします
|
1 |
$ pip install --upgrade pip |
numpyをインストールします
|
1 |
$ pip install numpy |
NumPyをimportしてみます
|
1 2 |
$ python >>> import numpy as np |
要素数が同じ場合、それぞれの要素に(element-wise)対して演算を実行してくれます。
|
1 2 3 4 5 6 7 8 9 |
>>> import numpy as np >>> x = np.array([1.0, 2.0, 3.0]) >>> y = np.array([2.0, 4.0, 6.0]) >>> x + y array([ 3., 6., 9.]) >>> x - y array([-1., -2., -3.]) >>> x * y array([ 2., 8., 18.]) |
また、スカラ値の組み合わせで算術することもできるようです。
|
1 2 3 |
>>> x = np.array([1.0, 2.0, 3.0]) >>> x / 3.0 array([ 0.33333333, 0.66666667, 1. ]) |
多次元の配列にも対応しています。
|
1 2 3 4 5 6 7 8 |
>>> A = np.array([[1,2], [3,4]]) >>> print(A) [[1 2] [3 4]] >>> A.shape (2, 2) >>> A.dtype dtype('int64') |
ベクトルの演算を行うこともできます。
|
1 2 3 4 5 6 7 8 9 10 11 12 13 14 |
>>> A = np.array([[1,2], [3,4]]) >>> B = np.array([[3,0],[0,6]]) >>> print(A) [[1 2] [3 4]] >>> print(B) [[3 0] [0 6]] >>> A + B array([[ 4, 2], [ 3, 10]]) >>> A * B array([[ 3, 0], [ 0, 24]]) |
ベクトルも同様にスカラ値と演算することができます。
|
1 2 3 |
>>> A * 10 array([[10, 20], [30, 40]]) |
同様にテンソルも作成できます。流石に見づらい感がありますねー。
|
1 2 3 4 5 6 7 |
>>> A = np.array([[[1,2],[3,4]],[[5,6],[7,8]]]) >>> print(A) [[[1 2] [3 4]] [[5 6] [7 8]]] |
ブロードキャスト
リストでは不可能だった、計上の異なる配列との演算が可能です。いわゆる行列の計算になります。
|
1 2 3 4 5 |
>>> A = np.array([[1,2], [3,4]]) >>> B = np.array([10,20]) >>> A * B array([[10, 40], [30, 80]]) |
思い出すのに時間かかる
|
1 2 3 4 |
>>> D = np.array([1, 2]) >>> E = np.array([[3,4]]) >>> D * E array([[3, 8]]) |
Matplotlib
グラフの描画ができるライブラリです。
|
1 |
$ pip install matplotlib |
インストールできたのでpythonコマンドからimportしてみます。
|
1 2 3 |
>>> import matplotlib.pyplot as pit Traceback (most recent call last): File "<stdin>", line 1, in <module> |
エラーとなりました。以下のコマンドで設定ファイルの位置を確認して、編集します。
|
1 |
$ python -c "import matplotlib;print(matplotlib.matplotlib_fname())" |
編集内容は「backend : macosx」を「backend : Tkagg」に変更することです。
次は正常にインポートできました。
グラフを書いてみます。
|
1 2 3 4 5 6 7 |
>>> import matplotlib.pyplot as plt >>> import numpy as np >>> x = np.arange(0, 10, 0.1) >>> y = np.sin(x) >>> plt.plot(x, y) [<matplotlib.lines.Line2D object at 0x10efe47b8>] >>> plt.show() |
するとウィンドウが立ち上がります。
便利ですね。複数線を引いたり、点線などの表示にも変更できるようですが、割愛。
画像の表示
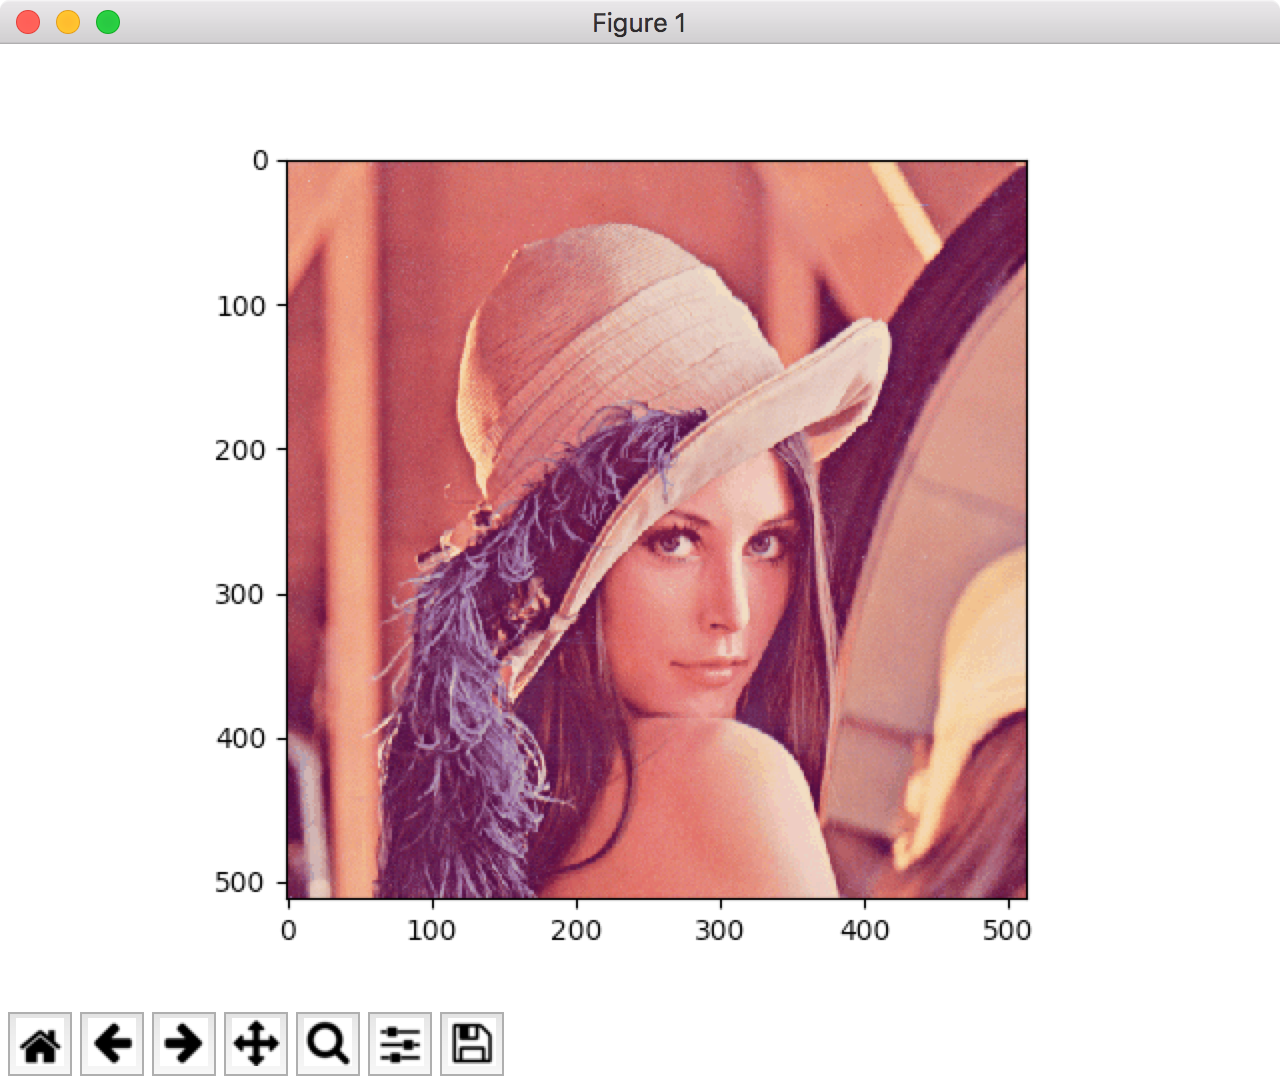
画像の表示もできるようです。指定した画像ファイルlena.pngはカレントディレクトリに配置されている必要があります。
|
1 2 3 4 5 6 |
>>> import matplotlib.pyplot as plt >>> from matplotlib.image import imread >>> img = imread('lena.png') >>> plt.imshow(img) <matplotlib.image.AxesImage object at 0x108467588> >>> plt.show() |
結果


